
VSCodeでリモートデバッグをするための手順をご紹介します。目標はリモート側の Linux 上で動く Python のリモートデバッグです。
クライアント:Windows10 + VSCode 1.44.0 + OpenSSH_for_Windows
ターゲット(サーバ):CentOS7 + Python 3.x
VSCode をリモート接続する手順については、VSCodeでリモートデバッグ(SSH編)を参照してください。ここでは、すでに VSCode のコンソールがリモート側の bash になっているという前提で進めます。
Extension のインストール
現在起動している VSCode は当初の VSCode とは独立したインスタンスなので、以前インストールした(かもしれない)Extension は未導入の状態になっています。Extension ボタンから、以下の Extension をインストールしておきます。
- Japanese Language Pack(任意)
- Python
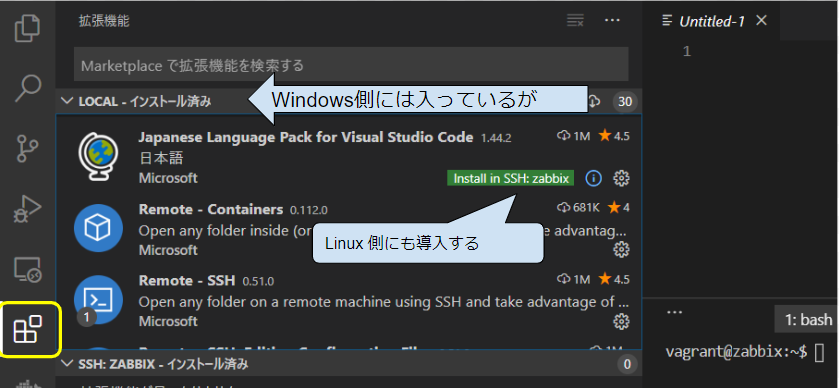
これらはリモートホストの ~/.vscode-server/extensions/ 配下にインストールされます。
リモート側のpython3環境
リモート(CentOS7)に標準で入っている python は 2.x です。まずは、python3 が入っていなければインストールします。ターミナルで作業します。
vagrant@zabbix:~$ python -V
Python 2.7.5
vagrant@zabbix:~$ rpm -q python3
package python3 is not installed
vagrant@zabbix:~$ sudo yum -y install python3
vagrant@zabbix:~$ rpm -qa|grep python3
python3-pip-9.0.3-7.el7_7.noarch
python3-setuptools-39.2.0-10.el7.noarch
python3-3.6.8-10.el7.x86_64
python3-libs-3.6.8-10.el7.x86_64
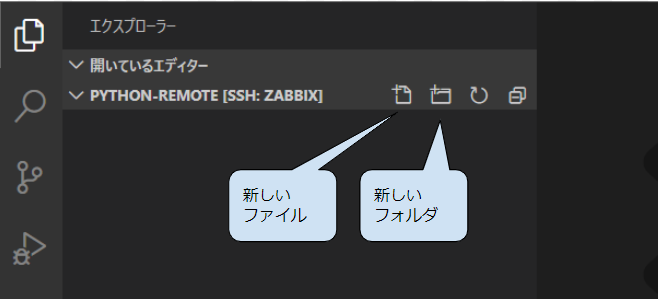
フォルダーを開く
サンプル用の python-remote ディレクトリを作ります。
vagrant@zabbix:~$ mkdir python-remoteVSCode のエクスプローラの[フォルダーを開く]から、作成した python-remote フォルダを選択し、[OK]をクリックして開きます。

アプリ仮想環境(venv)の作成
この中に venv 環境を作成します。コマンドの出力は一部省略しています。ターミナルが閉じている場合はメニューの[ターミナル]>[新しいターミナル]で開いて作業します。
vagrant@zabbix:~/python-remote$ python3 -m venv env
vagrant@zabbix:~/python-remote$ . ./env/bin/activate
(env) vagrant@zabbix:~/python-remote$ which python
~/python-remote/env/bin/python
(env) vagrant@zabbix:~/python-remote$ python -V
Python 3.6.8
(env) vagrant@zabbix:~/python-remote$ which pip
~/python-remote/env/bin/pip
(env) vagrant@zabbix:~/python-remote$ pip -V
pip 9.0.3 from /home/vagrant/python-remote/env/lib64/python3.6/site-packages (python 3.6)
vagrant@zabbix:~/python-remote$ python -m pip install --upgrade pip
(env) vagrant@zabbix:~/python-remote$ pip -V
pip 20.0.2 from /home/vagrant/python-remote/env/lib64/python3.6/site-packages/pip (python 3.6)
サンプルアプリの設置
ディレクトリの中に、リモートデバッグの対象となるサンプルアプリ hello.py を作成します。
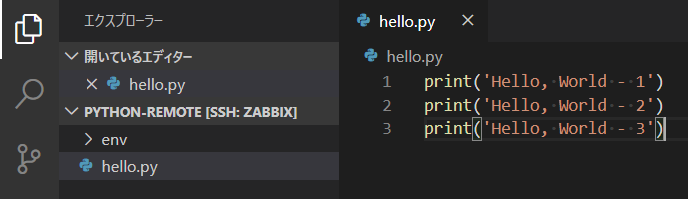
ここでいったん[ファイル]>[フォルダーを閉じる]でフォルダーを閉じて、再度[フォルダーを開く]から remote-python を開きます。ソースコードの右上に現れた▶(実行ボタン)をクリックすると、自動的に仮想環境の切り替えが行われ、実行結果がターミナルに表示されます。

Pythonのデバッグ
(Python に限らず、)デバッグは[実行]>[デバッグの開始[F5]]から行います。行番号の左をクリックしてブレークポイントを設定し、[F5]でデバッグを開始します。
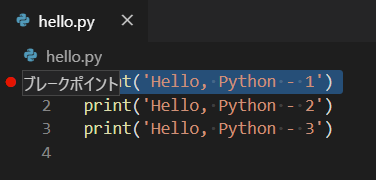
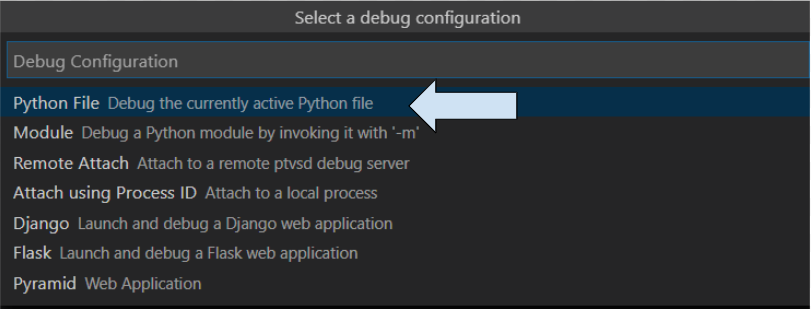
デバッグの開始方法を聞かれるので、[Python File] を選択します。
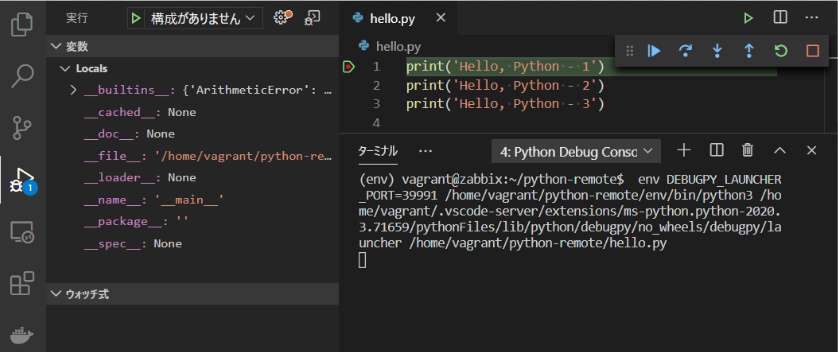
ブレークポイントの行で止まります。ツールバーは以下のようになっています。
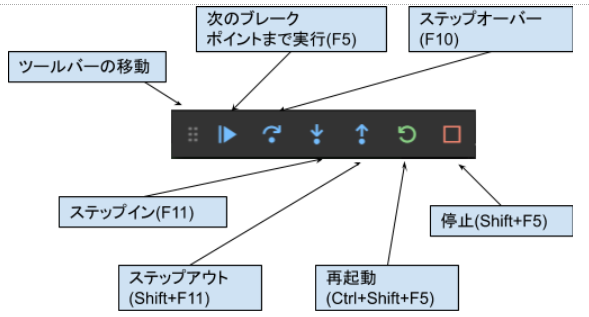
ここまで来れば、他のデバッガと同じように使えます。エクステンションも豊富に揃っているので、ぜひ使ってみてください。

コメント
[…] VSCode でリモートデバッグ | ネットワーク管理者 (の卵) 養成講座 […]